Hang Drywall Flawlessly: Corner Beads & Smooth Finishing
Mastering the art of hanging drywall is a game-changer in any home renovation project. It’s the invisible foundation that sets the stage for a flawless finish. Whether you’re tackling a new build or refreshing an old room, getting the drywall right is crucial. In this guide, you’ll learn the essential steps to properly hang drywall, ensuring your walls are sturdy and seamless before moving on to the finishing touches.
You’ll discover how to choose the right type of drywall for your specific project and the techniques to securely fasten it to wall framing and ceiling joists. Plus, we’ll share insider tips on preparing for the taping and finishing process, so you can achieve that perfect, paint-ready surface. Let’s dive in and transform those bare frames into smooth, solid walls.
Tools and Materials
Essential Tools
When taking on the task of hanging drywall, a set of essential tools will make your project efficient and ensure a professional finish. Drywall lift, while optional for smaller tasks, becomes a necessity for ceilings or high walls. You’ll find that it not only makes the job more manageable but also reduces the risk of the drywall breaking from mishandling.
Coarse-thread drywall screws are vital for fastening drywall sheets to wood framing whereas fine-thread screws are for metal studs. Using an electric drill is common, but for the best results, a drywall screw gun is preferred as it’s designed specifically to set screws at the perfect depth without damaging the drywall.
| Tool | Purpose |
| Drywall Screw Gun | For fast, accurate screw placement into drywall |
| Coarse-thread Screws | To fasten sheets to wood framing (1 5/8″ for walls, 2″ for ceiling) |
| Fine-thread Screws | To fasten sheets to metal studs |
| Drywall T-square | For straight, accurate cuts |
| Utility Knife | For scoring and cutting drywall sheets |
| Drywall Saw | For making cutouts in drywall sheets |
| Measuring Tape | To measure and mark drywall for cutting |
| Chalk Line | To snap long, straight lines for cutting |
| Drywall Screw Setter Bit | To countersink screw heads |
Optional Tools
In addition to the essentials, some optional tools can upgrade your drywall hanging experience. A laser level can expedite the installation process, especially on larger projects, by ensuring precise alignment without constant measuring.
Hole saw bits are particularly useful when you need to create neat, circular cutouts for electrical outlets or piping — a task that’s more challenging with just a drywall saw.
A drywall square aids in achieving those perfect, straight cuts, going further than a regular metal yardstick.
| Tool | Purpose |
| Laser Level | For precise alignment and leveling |
| Hole Saw Bits | For creating clean circular cutouts |
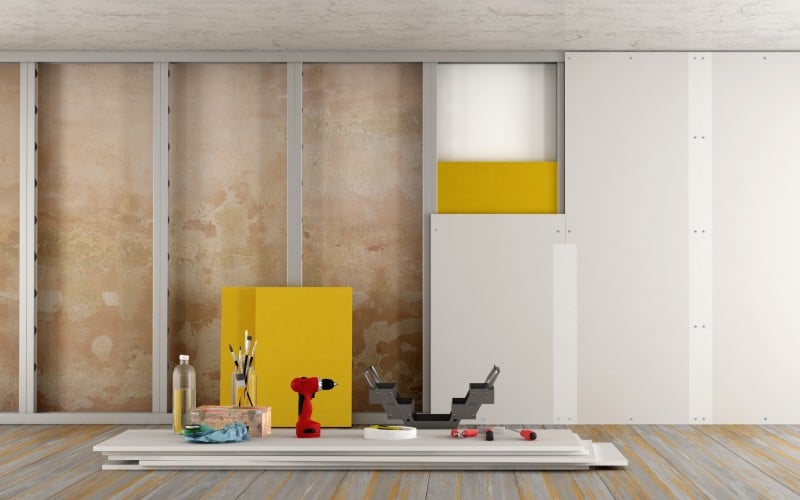
Materials
In the world of drywall, the right materials are just as crucial as the tools used. You’ll most likely be using 4 x 8 UltraLight Sheetrock, a popular choice for its manageable weight and durability.
Drywall tape, with paper tape being the most preferred, is essential for reinforcing the joints between sheets, giving you that smooth, uninterrupted surface post-finishing.
Drywall setting compounds, often referred to as ‘mud’, are used in conjunction with the tape to fill in screw holes, seams, and any imperfections, forging a seamless canvas for painting or wallpapering. And lastly, a topcoat of drywall mud for that final touch, rejuvenating your walls into a pristine state ready for decoration.
| Material | Use |
| UltraLight Sheetrock | Base material for walls and ceilings |
| Drywall Tape | For joint reinforcement |
| Drywall Mud | To fill and smooth over seams, holes, and imperfections |
| Topcoat | Final layer for a polished finish |
With this comprehensive toolkit and material set, you’re well-equipped to create walls that are not only structurally sound but also aesthetically flawless.
Preparing the Workspace
When hanging drywall, setting up your workspace correctly is as critical as the installation itself. You’ll need a clear, accessible area and precise measurements to ensure a job well done. Let’s delve into the key preparatory steps.
Measuring and Marking
Accuracy is paramount when it comes to drywall installation. Before you even think about lifting a panel into place, you’ve got to get your measurements spot on. Here’s what you need to know:
- Calculate Drywall Quantity: Take the total square footage of your walls and ceilings and divide by 32, the area of a 4×8-foot sheet. Always purchase an extra sheet or two per room to account for any mistakes or mishaps.
- Precise Diagrams: Sit down with your tape measure and a notepad. Sketch out the dimensions of each wall and ceiling where drywall will be applied. Detail out each measurement, corner to corner, and ensure consistency by measuring widths at various points along the length.
- Marking for Cutouts: Carefully transfer measurements to your drywall sheets, marking out where cuts need to be made for electrical boxes and fixtures.
Clearing the Area
A clutter-free space enhances safety and efficiency. Before unwrapping the first sheet of drywall:
- Shift Furniture: Remove all furniture or obstructions from the room, leaving yourself ample space to maneuver the large sheets.
- Protective Measures: Shield your flooring with drop cloths or ram board to prevent damage from tools, drywall sheets, and debris.
- Electrical Safety: Ensure all electrical cables are not exposed to where screws or nails will be driven. Use nail plates to protect wires or plumbing close to the edge of the studs.
Preparing the Walls
The walls themselves need to be as ready as you are:
- Stud Inspection: Verify that each stud is securely in place and that none are bowed or misaligned, as this could disrupt the smooth finish of your drywall.
- Metal Shields Installation: When wires or pipes are closer than 3/4 inches to a stud edge, attach a nail plate to shield them from accidental punctures.
- Clean Surfaces: Sweep the walls to remove dust or debris that could interfere with the adhesion of drywall tape or mud.
Remember, a well-organized, meticulous approach to preparing your workspace paves the way for a smoother installation process. Embrace each step of the preparation to ensure the most flawless finish for your drywall installation.
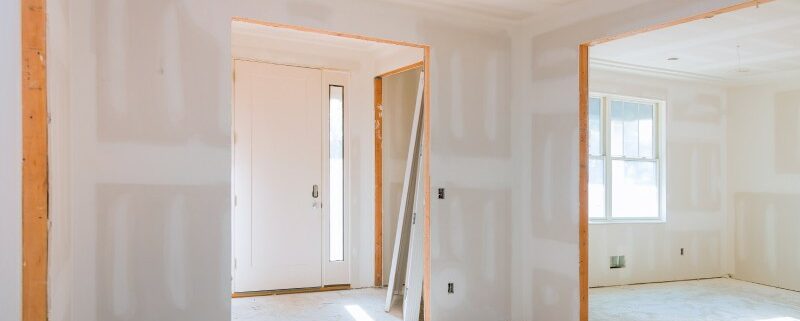
Installing the Drywall
Proper installation is key to ensuring that the drywall looks smooth and finished. In the sections below, you’ll find out how to cut, hang, and secure drywall effectively, as well as how to manage corners and edges for a professional look.
Cutting the Drywall
Cutting drywall accurately is essential for a snug fit between panels. Here’s the process:
- Score the front side of the drywall using a sharp utility knife and a straightedge, cutting just through the paper.
- Snap the panel along the scored line. For a complete separation, run the knife along the backside paper.
- Use a drywall saw for irregular cuts, applying quick, short strokes.
- Make pre-cuts for electrical outlets or switches before mounting the drywall sheet to the wall.
Accuracy is paramount; double-check your measurements to avoid wasted materials.
Hanging the First Sheet
Begin by hanging the first sheet horizontally and follow these steps:
- Secure the panel with a screw at the center, ensuring it hits a stud.
- Measure 16 inches to the left and right, marking each stud’s position.
- Follow the marks with screws to attach the drywall firmly in place.
The initial sheet serves as a guide for the rest, so it’s vital to align it correctly.
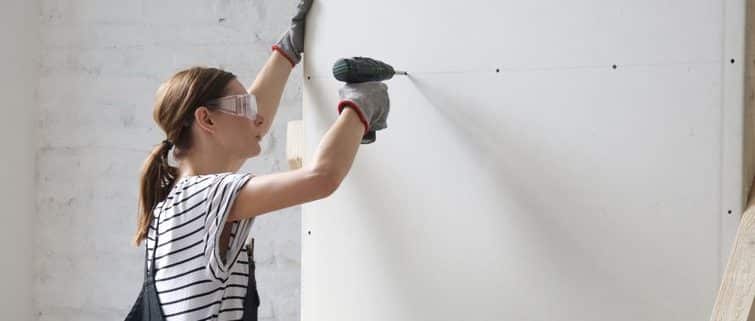
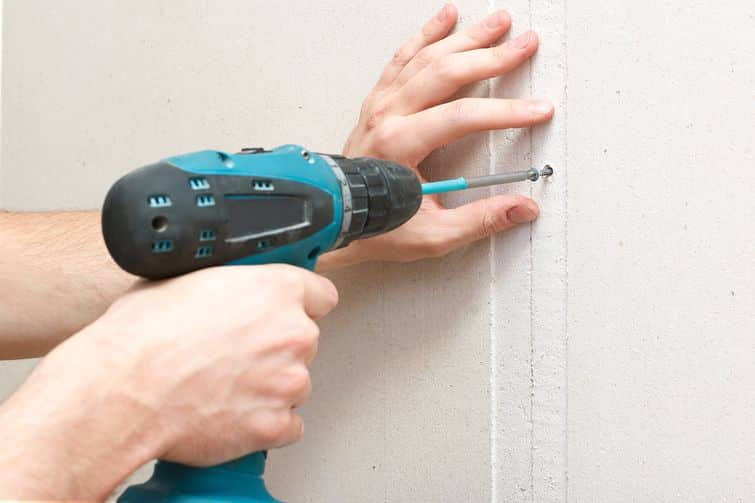
Securing the Drywall
Use screws rather than nails to secure the drywall because screws provide better holding power. To secure the sheets:
- Space screws about 16 inches apart along the studs.
- Drive screws until the head is slightly dimpled without breaking the surface paper.
- Avoid overtightening which can compromise the drywall integrity.
Ensure each panel is fastened properly, minimizing the risk of future issues such as nail pops.
Dealing with Corners and Edges
Corners and edges can be tricky, but with the right approach, they’ll look seamless:
- For inside corners, use a drywall knife to push the tape into the corner.
- Outside corners require metal or plastic corner beads for protection and a crisp edge.
- Apply joint compound smoothly, sanding between coats for a polished appearance.
Managing these areas attentively is critical for a professional-grade finish.
Hanging the Remaining Sheets
Continue hanging the rest of your drywall with the same meticulous method:
- Align and secure each sheet horizontally, following the stud marks.
- Maintain a gap of about ¼ inch at the bottom to avoid buckling from floor expansion.
- Stagger vertical seams to add strength to the installation.
Remember, uniformity and precision during this step ensure a smooth taping and mudding process later on.
By following these guidelines, you’ll have a well-installed drywall ready for the final finishing touches.
Taping and Mudding
Applying the Tape
Once you’ve installed your drywall, it’s time to begin the taping and mudding process. Taping is crucial for concealing joints between drywall sheets and preventing cracks in the finished walls. Start by applying a thin layer of drywall mud along the seams. Precut your drywall tape to the required length before you begin – this makes the application smoother and decreases the chance of mistakes.
Here’s how you’ll apply it:
- Lay the tape over the seam, pressing it firmly into the mud.
- Use a drywall knife to smooth out the tape, ensuring it adheres properly without any bubbles or creases.
- Carefully wipe away any excess mud.
Remember, paper tape is often preferred over other types for its strength and ease of use.
Applying the First Coat of Mud
The first coat of mud is also known as the bedding coat. Apply a liberal amount making sure that it’s slightly thinner than normal; this ensures a good bond with the tape. Don’t strive for perfection with the first coat; focus on good coverage.
Key points for the first coat:
- Cover the seam completely with mud.
- Apply the tape and flatten it using a 6- or 8-inch drywall putty knife.
- Smooth out any excess mud to leave a flat surface.
Be patient – don’t rush this step. Let the first coat dry completely before moving onto the next phase.
Sanding and Applying Subsequent Coats
Once the first coat has dried thoroughly, you’re ready for sanding. Using medium grit sandpaper, sand the dried mud smoothly, being careful not to scuff the paper surface of the drywall.
After sanding, apply additional coats:
- Use fine grit sandpaper for finishing touches.
- Allow each coat to dry fully before applying the next.
- Patience is key, numerous thin coats will yield better results than a few thick ones.
It’s advised to use pink mud that changes to white upon drying, indicating readiness for the next layer. Remember to never apply mud over wet tape – always wait at least 24 hours between coats, barring the use of fast-drying ‘hot mud’.
By religiously following these steps, you ensure a smooth, professional-quality wall surface, ready for priming and painting.
Finishing Touches in Drywall Installation
Once you’ve secured your drywall panels, the next stages will focus on refining your work to achieve a seamless and professional quality finish. Pay close attention to the details here – the success of your drywall installation lies in the precision of the finishing touches.
Installing Corner Beads
Corner beads are critical for achieving crisp, clean lines at the edges of your walls. They reinforce the drywall, making corners more durable and less prone to cracking or damage.
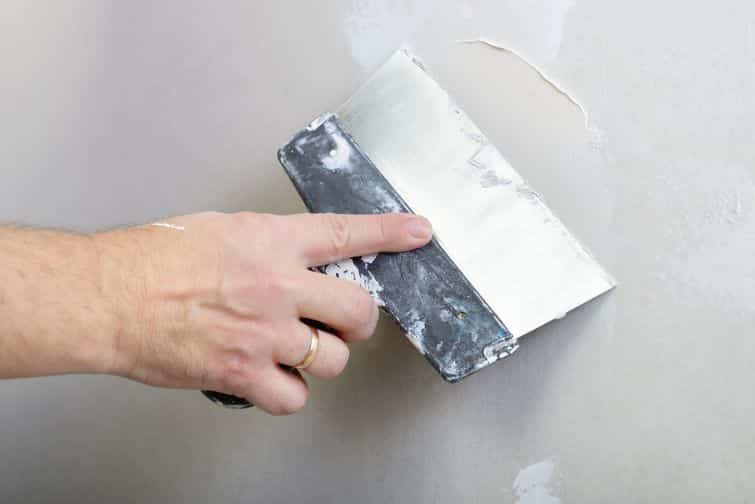
Patching Any Imperfections
Despite your best efforts, imperfections can appear during the drywall installation process. This might include indentations, small holes, or rough patches. Screening the mud smoothly across joints and dimples is essential for a flawless finish.
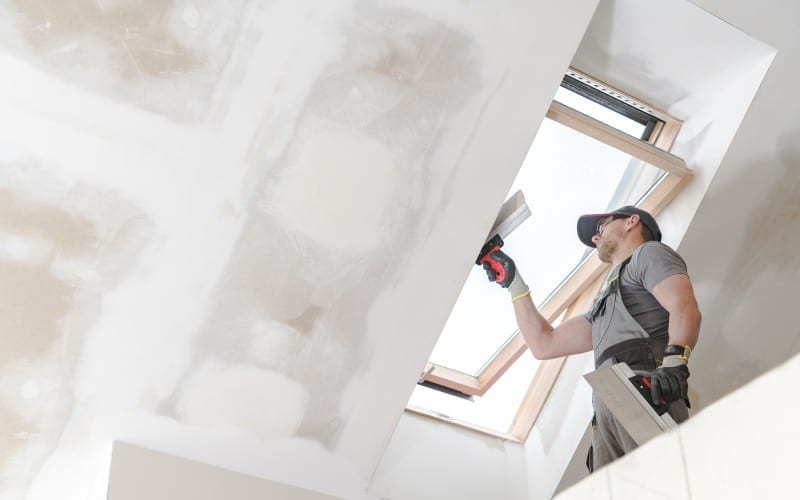
Sanding and Smoothing
The final step in the drywall process is sanding. This step will make all the difference between a job that looks good enough and one that looks truly professional.
Installing drywall is a task not to be taken lightly requiring plenty of tools, materials, and skill. The experts at Honest Renovations are true professionals with experience in drywall and other renovations who would be happy to help you with your project.